Learning to Recognize Initial Sounds
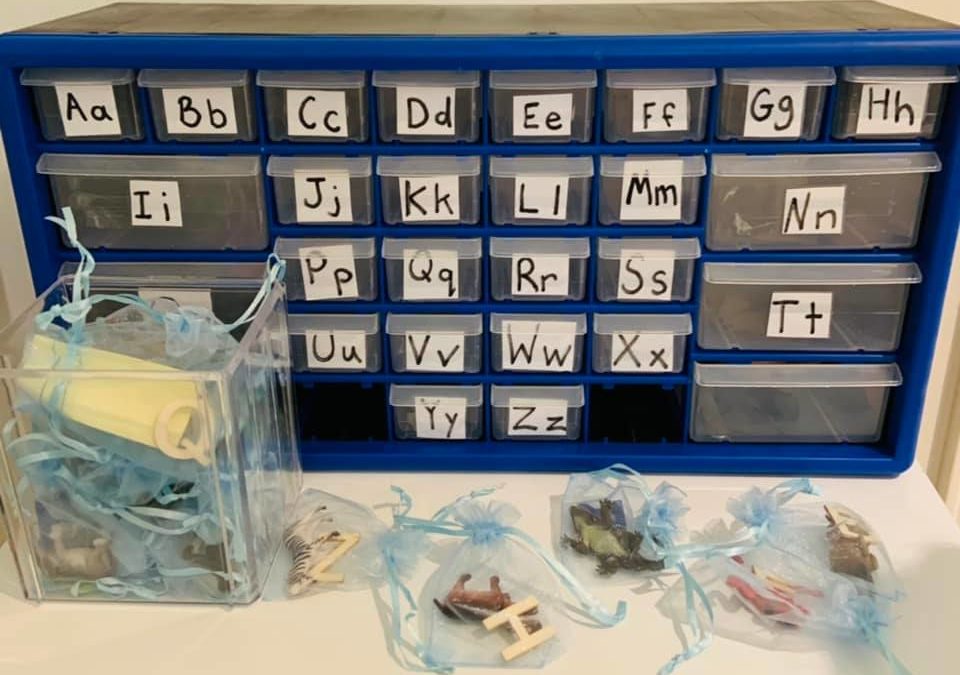
When children begin to become interested in learning to read or write the first games played in Montessori homes are usually sound games. I spy but with initial, middle or ending sounds depending on what skills the child has in this area. “I spy something that starts with a “buh” for example when you want he child to identify a butterfly. Many homes also enjoy using small objects that go along with each initial sound. That is what I want to discuss today. My four year old has known letter sounds for two years now, but he is still learning to slow down and listen to hear sounds in spoken words. That is where this game came in, because he desperately wanted to learn but did not want to work with the sound game or sandpaper letters anymore. Since he speaks so quickly he was finding the moveable alphabet frustrating as well. I set up the initial sound boxes first using a hardware storage shelf from Princess Auto. Each compartment is labeled with a letter and contains a number of objects that start with that letter. Personally I change the objects up on occasion so that certain sounds are not associated with only specific objects ( I have known many children who see an a and assume the word must be apple because they have had it drilled into them. A is for apple). At our first introduction we went through the different compartments and identified the objects inside. The next time we did the activity I asked him why a group of objects were in a compartment together, and we said the names again until it dawned on him that they had the same initial sound. He went through all the compartments with excitement and listened to initial sounds carefully as we said each word. The next time he pulled this activity down he dumped every single object out. I was a little worried that he would become frustrated but I stayed back and observed, ready if he needed me. He went through every single object naming it and placing them back in the correct compartments. When he was finished, he dumped it and did it again. After a while I noticed that he was using the moveable alphabet with more confidence, he had figured out how to slow down and really listen to the sounds he was making. I have yet to rearrange the bins for ending sounds as his interests shifted but that will be my next step.
Little miss is also very interested in letters, she has a strong desire to use her brothers primary materials. Since she is not at all ready for any of these language materials I have been keeping mostly the sandpaper letters within her reach. It has not been enough for her, she wants similar materials to her brother. She wants letters to manipulate and small objects to explore. Since we were finished with the sound boxes for now I adjusted and made an activity that met her desires without misusing Mr Mans materials. Generally I would prefer not to introduce letters to such a young child but in this case the activity is mostly about in and out more than the letters. I found some dollar store wooden letters, and some organza bags. Each organza bag contains one letter and one object with a corresponding initial sound. I set out two bags in a basket and Little Miss enjoyed taking them in and out of the bags. She also loved the access to the little wooden letters (I just wish they were lower case!) I am not putting too much emphasis on the letters right now, but when she shows them to me I will say the letter sound. I am noticing that she is remembering some of the letter sounds. Mr Man also enjoys this makeshift activity but he likes to grab a handful out of the tub and work through them all at once.


